
Barn doors aren’t just old farm junk anymore—they’ve busted into houses with a rugged look that saves space and grabs attention. Slapping one on a closet or splitting a room is a sweet DIY gig if you’ve got the nerve and some tools. The designs? They run from basic wood slabs to slick glass setups, each with its kick to fit your style. This piece walks you through nailing the install step-by-step and shows off the coolest door ideas, all with that hands-on, real-deal feel. Let’s dive in.
Why Barn Doors Rule
These doors are a big deal because they’re smart and look badass. Unlike regular doors that swing and hog space, barn doors slide on a track, perfect for cramped spots like tiny apartments or busy rooms. They kicked off on farms—old wood slabs on creaky rails—but now they’re a home upgrade, adding that rough charm to bedrooms or kitchens. Since the 2010s, they’ve been climbing, and with cheap hardware kits at stores, anyone with a drill can give it a shot. It’s a way to save cash and flex your DIY skills.
Gear and Materials to Grab
You don’t need a fancy shop, but get the right stuff. Snag a tape measure, level, stud finder, drill with bits, screwdriver, miter saw, clamps, and a hammer. For materials, grab solid wood like pine or cedar (reclaimed stuff adds grit), a track kit (6-8 feet long), rollers, handles, screws, and a 1×4 or 1×6 backer board. Safety’s no joke—grab gloves, goggles, and earplugs if you’re cutting. A buddy to lift is clutch since doors can weigh 50-200 pounds. Check your kit for extras like stoppers or guides.
Getting the Measurements Spot-On
Screw this up, and you’re in trouble. Measure your doorway width and height—add 2-3 inches to the width for overlap on both sides and 1/2 inch at the bottom for clearance. For doubles, double the width plus overlap. Check wall space—your door needs room to slide open fully, so mark at least its width to one side (or both for doubles). Use a stud finder to hit wall studs above the frame—track has to lock into these. Sketch it, check with a level, and move stuff like switches if they’re in the way. Get it right, or you’ll be cussing later.
Choosing Your Door Style
The design sets the mood. Plank style is old-school—wood boards with a crossbuck for that farm feel. Glass doors with etched patterns let light in for bathrooms, framed in metal for a modern edge. Double doors handle big spaces with a rustic bang, while Shaker offers clean lines for a simple look. Match it to your room—rustic for a kitchen, glass for an office. Wood matters—cedar fights bugs, pine’s easier on your wallet. Hit up a hardware store or flip through pics for ideas, but pick what fits your space and skills.
Building It From Scratch
If you’re making it, start with your measurements. Cut 1×6 or 1×10 boards to the door height, aim for 6-8 vertical slats based on width. Trim outer boards to 3-4 inches for edges, and cut 1×6 rails for top, bottom, and maybe center. Lay it flat, glue and nail with 1-1/2 inch finishing nails, clamping hard. Add a diagonal trim or chevron cut with a miter saw for flair. Sand with 100-grit paper, then stain or paint—wait 24 hours to dry. Building it yourself beats store-bought every time.
Setting the Track Straight
The track’s the guts of it. Cut a backer board to match your track length (6-8 feet), paint it to hide against the wall, and let it dry. Find studs with a stud finder, mark them 3-4 inches above the frame, and hold the board level. Pre-drill holes at stud spots, screw it in with 2-1/2 inch screws—fill holes with wood filler after. Bolt the metal track to the board with kit screws, keeping it level. Add stoppers at the ends to keep the door in check. Mess this up, and it’s a crooked mess.
Slapping the Door Up
This is where you need muscle. Screw rollers to the door top—mark spots from the kit, drill pilot holes, and tighten. Get a buddy—lift the door, line up rollers with the track, and slide it on. Check it’s level with a tape measure (same gap top and bottom) and tweak if it wobbles. Add a floor guide—groove the door bottom or screw it to the floor—to stop swinging. Toss on anti-jump discs if they came with it. Test the slide—if it sticks, recheck the track. Don’t try this solo with a heavy door, or you’ll eat floor.
Polishing It Off
Finishing makes it yours. Stick on a handle—metal bend for rustic, recessed for sleek—drill pilot holes and screw it down. For bathrooms, add a latch (hook or deadbolt) for privacy. Caulk gaps between the backer and wall, then paint over. Wipe dust with a damp cloth. Some kits have soft-close extras—nice to skip slams. Step back and check it out—your door’s not just there, it’s got your stamp. This is where the build turns into bragging rights.
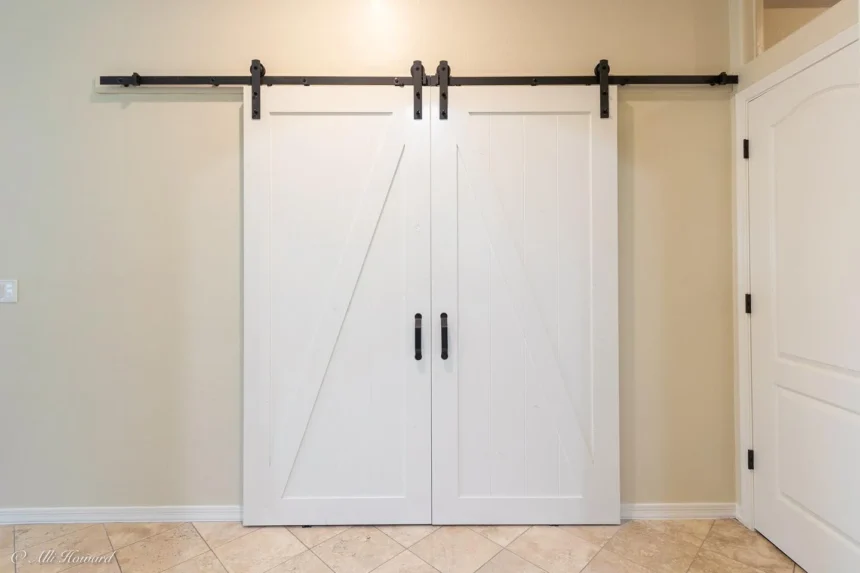
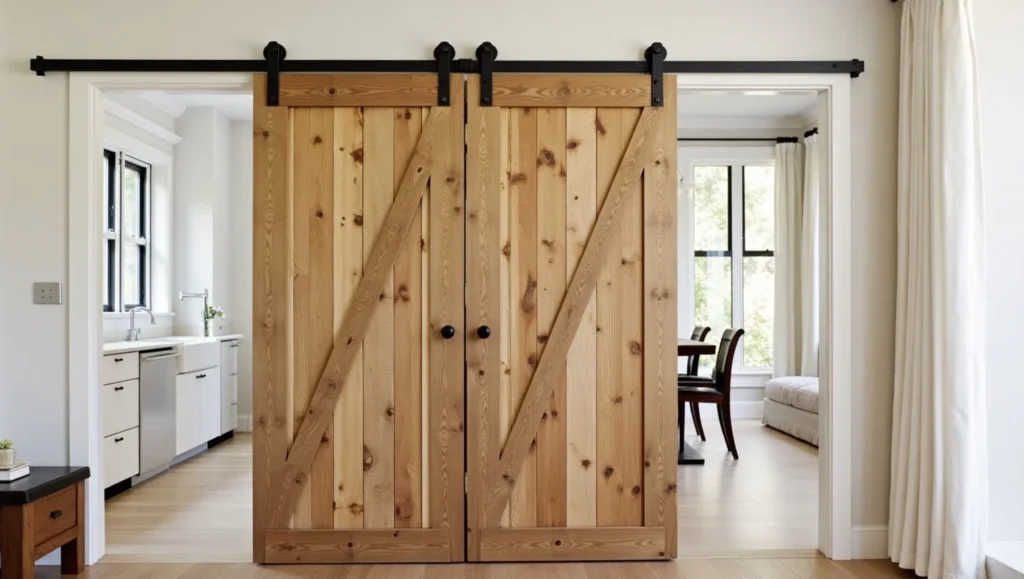
Classic Plank Vibe
Plank style is the go-to—vertical 1×10 boards nailed to horizontal rails, often with a crossbuck (X-shape) for that farm kick. Use pine for cheap builds or cedar to dodge bugs. Stain it grey for a worn look or paint white for clean lines. Great for garages or pantries, pair it with black hardware. Throw in uneven boards or a zigzag trim for a unique twist—keeps it rugged but fresh.
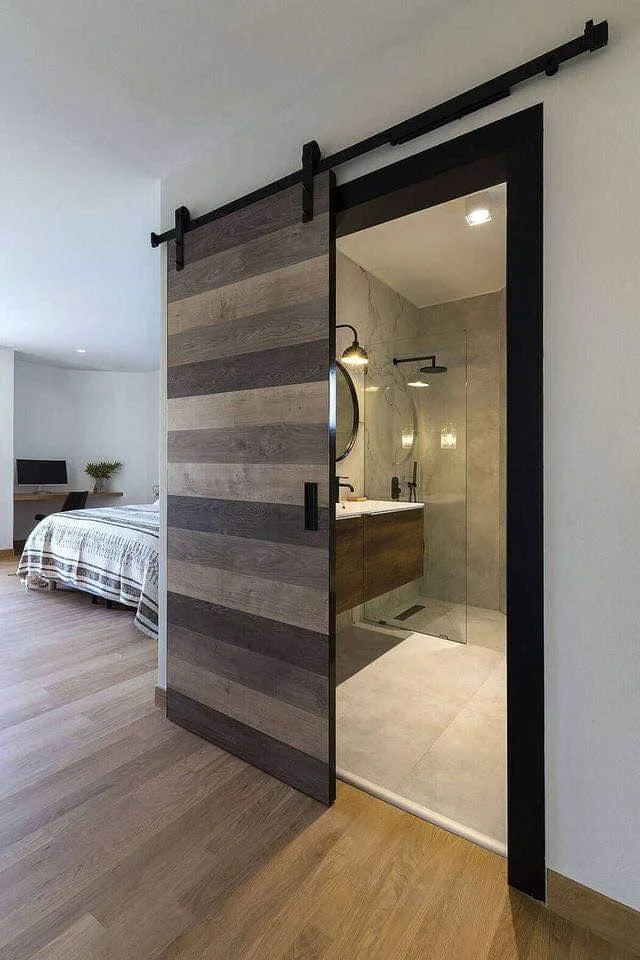
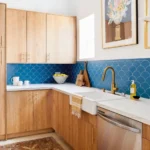
Sleek Glass and Metal Twist
Glass doors bring a sharp edge. Tempered glass with etched designs (frosted or custom) fits modern spots, letting light in for bathrooms or offices while hiding mess. Frame it with birch or metal, use stainless steel hardware for a crisp finish. Some go with iron planks for an industrial-rustic mix. Sizes hit 2.5-4 feet wide, 6.6-8 feet tall—measure your spot. It’s pricier but lights up dark rooms.
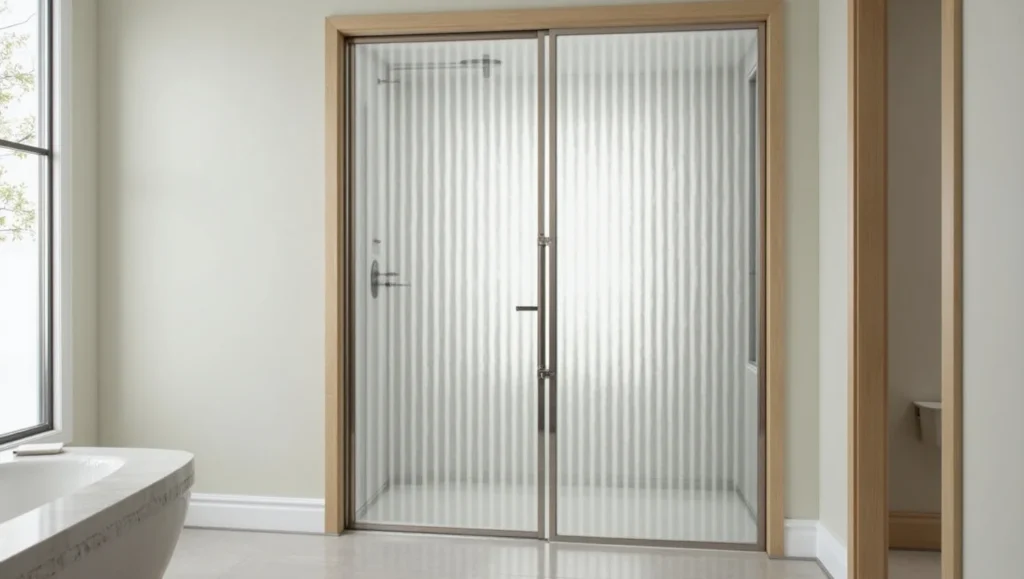
Bold Double Door Look
Double doors tackle big openings with punch. Two panels, 3-4 feet each, slide on a dual track, overlapping 3 inches in the middle. Knotty alder or reclaimed wood with a mid-rail or double X screams rustic—perfect for living rooms. Round tracks with ball-bearing rollers keep it smooth. Stain dark or leave natural for that beat-up charm. Needs 12-16 feet of wall space, but it’s a showstopper.
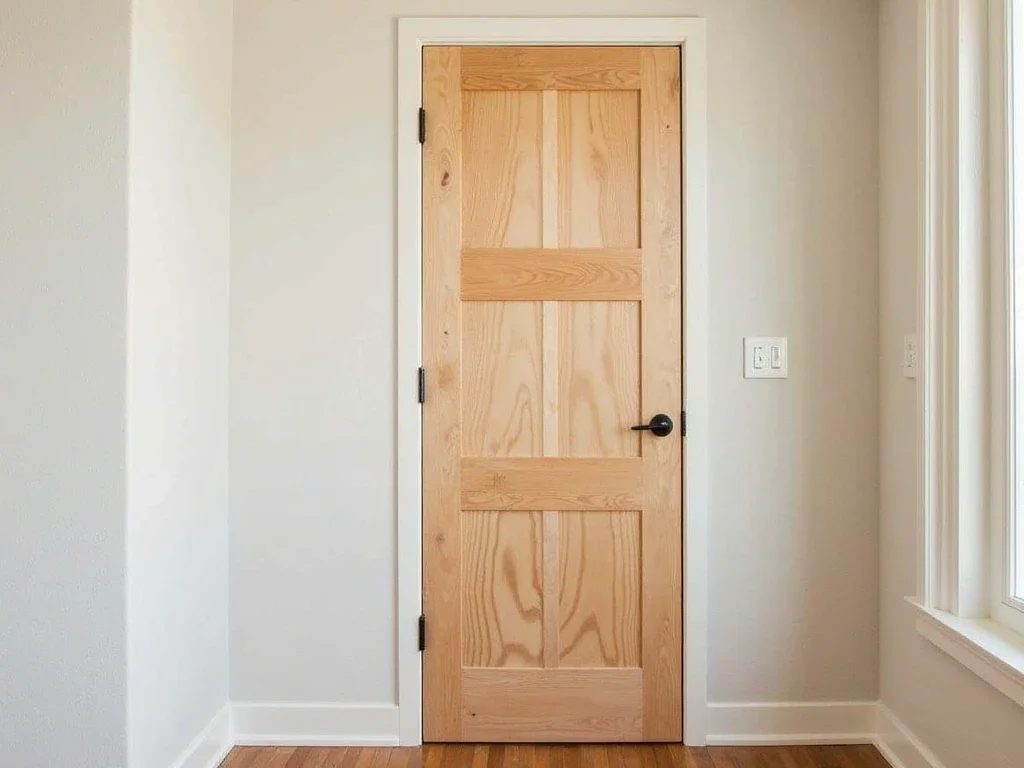
Clean Shaker Setup
Shaker doors are simple and sharp, great for minimalists. Frame 1×2 or 1×3 boards with flat panels inside—two or four rectangles. Paint white or grey for modern, or stain for a soft rustic feel. Build with pine, add a center rail for strength. Lighter than planks, it fits bedrooms or closets, paired with oil-rubbed bronze hardware. The clean look hides the skill—tight cuts make it pop.
Keeping It Running Smooth
Keep it solid with easy care. Brush dust off the track monthly—grime gums up rollers. Wipe the door with a damp rag and mild soap for dirt, dry quick to skip stains. Check screws yearly—tighten if loose. Oil metal parts with light lube if they stick, but skip wood to avoid rot. Don’t slam it—add soft-close if you can. With this, your door stays tough for years.