Dill is an aromatic and flavorful herb that is easy to grow and popular to use in many cuisines. Knowing the best time and method for harvesting dill ensures you get the maximum flavor and use out of your dill crop.
Growing Conditions for Optimal Dill Harvests
Bumper dill harvests start with excellent growing conditions from seed to harvest. Here are some key tips:
- Sun Requirements: Dill thrives best in full sun. Even just a half-day of shade will significantly reduce growth rates and productivity. Choose the sunniest garden bed or container location possible.
- Soil Needs: Plant dill in fertile, well-drained soil. Amend with aged compost or manure before planting to provide plentiful nutrients for strong growth. Dill prefers slightly acidic to neutral pH soil.
- Temperature Factors: Dill enjoys cool weather and suffers once temperatures exceed 80°F. Time spring and fall plantings accordingly. Provide shade covers if growing summer crops.
- Companion Planting: Some beneficial companions for dill include lettuce, kale, cabbage, onions and cucumbers. Compatible flowers to interplant include cosmos, zinnia and nasturtiums which attract helpful pollinators.
- Container Growing: Dill thrives in containers at least 10-12 inches deep with drainage holes. Use a quality potting mix and position containers where they receive maximum sunlight. Even moisture levels are easier to control compared to garden beds.
When your dill has ideal conditions, it will reward you with higher yields at harvest time all season!
Stagger Your Dill Plantings
Rather than sowing all your dill seeds at once, you can dramatically extend your harvesting window by staggering successive plantings.
For example, sow an early crop 6-8 weeks before your last expected spring frost date, when the ground is workable enough to till and prepare for planting. Then put in another round of seeds 2-3 weeks after the first group when soil temperatures are reliably warmer.
Repeat the process every couple of weeks. The first plants mature will be ready to start harvesting from when the later seedling groups are still establishing. This provides you a steady supply of dill over several months rather than all at once.
You can also sow new dill again in late summer or early fall in zones with longer growing seasons. The autumn crop may overwinter as small seedlings and be ready to take off growing fast when spring arrives again. Or transplant seedlings indoors under lights over winter to use for fresh sprigs in recipes.
Stagger your dill plantingsfor a continual harvest!
Extra Flavor Concepts
As a highly versatile herb, dill teams up deliciously with many other ingredients. Here are some flavor combination ideas to try:
Dill & Lemon
The cool acidity of citrus perfectly complements fresh dill. Add lemon wedges or zest to seafood dishes, yogurt dips, salad dressings and more featuring dill.
Dill & Garlic
For an aromatic flavor boost, saute chopped garlic briefly before adding snipped dill sprigs when cooking. The combination punches up soups, roasted meats, boiled grains like farro or quinoa and stove-top potato recipes.
Dill & Onion
Saute sweet onions and dill together to use as a crunchy topping for burgers or tacos. Or add both when pickling red onions to serve on salads and sandwiches.
Dill & Mustard
Pair dill with zingy mustard flavors in potato or pasta salads bound with a blend of mayonnaise and Dijon or whole grain mustard. Also perfect for mixing into yogurt dips for raw veggies. The mustard notes perfectly balance fresh dill and lemon flavors.
Dill & Cucumber
It just makes sense to add fresh dill when preparing cucumber salads, sandwiches, chilled summer soups like gazpacho or quick refrigerator pickle chips. Dill also complements the cooling flavor of yogurt-based tzatziki sauce.
Dill is very versatile in the kitchen. Have fun getting creative with complementary flavors!
Pickling Spice Blend
Want to make your own pickling spice mixes using freshly harvested dill and coriander seeds? Follow this tasty recipe:
Ingredients:
- 3 Tbsp dill seeds
- 3 Tbsp coriander seeds
- 1 Tbsp mustard seeds
- 2 tsp whole allspice berries
- 2 tsp whole black peppercorns
- 3 dried bay leaves, crumbled
- 1-3 small hot red chile peppers, dried and crushed
Instructions:
Combine all spices together thoroughly. Store homemade pickling blend in an airtight container away from light. Use within 1 year for maximum flavor.
Rub or sprinkle the zesty mixture directly over raw cucumbers or other vegetables before lacto-fermenting into tasty pickled treats like dilly beans. Or steep a few tablespoons in vinegar brines to add plenty of zip to canned vegetable pickles. Adjust heat by adding more dried chile flakes.
When is Dill Ready to Harvest?
Identifying Maturity
Knowing when your dill plant is mature enough for harvesting is key. Here are the signs to look for:
- Height: Dill will grow 1-4 feet tall when mature. Once it stops growing vertically, it is likely ready.
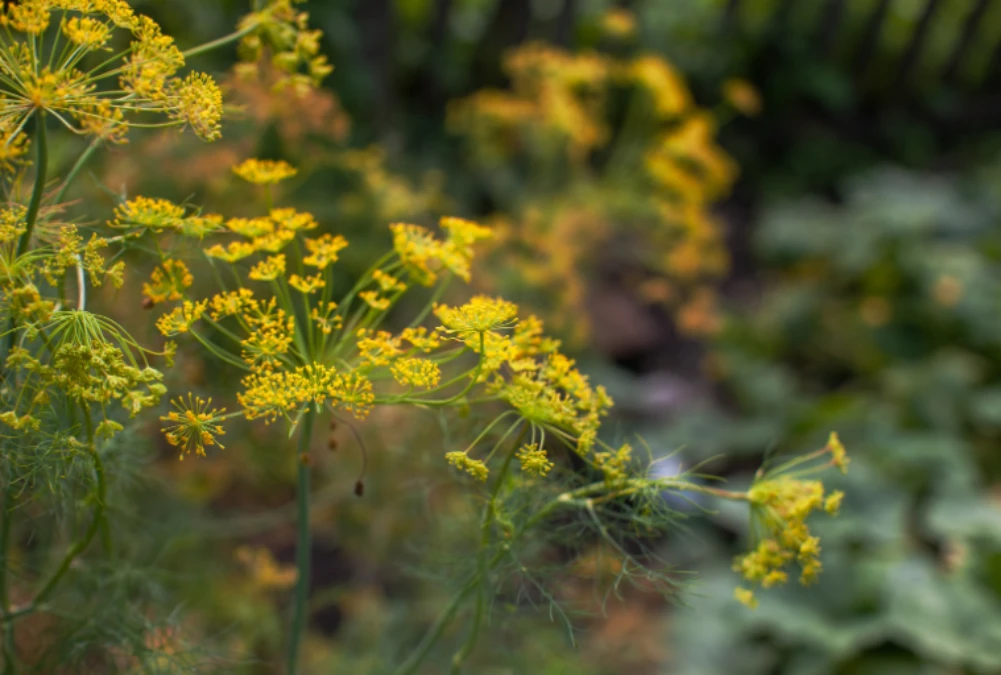
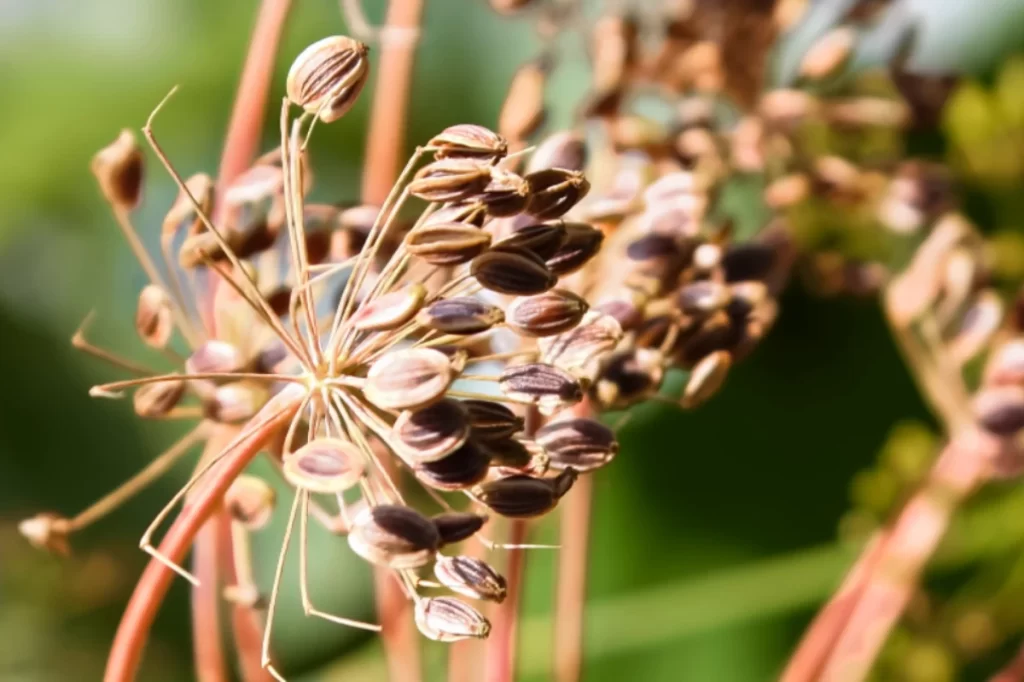
- Flowers: Bloom heads will turn from yellow to brown and form seeds. Both seeds and flowers can be harvested.
- Stems & Foliage: Thicker, woodier stems and very fine, feathery leaves indicate maturity.
Mature dill has a stronger, more intense flavor for seasoning. Baby dill has a milder taste best for fresh eating. You can harvest dill at any stage depending on your intended use.
Time of Year
Dill grown in spring or fall takes 10-12 weeks from planting to mature. Summer-grown dill may bolt faster in hot weather, taking 6-8 weeks to harvest. To have a steady supply, sow new seeds every 2-3 weeks. The peak season for dill harvest is mid-summer. However, you can often have multiple harvests from early summer through fall in most climates.
What Parts Of Dill Are Used for Harvesting?
All parts of the dill plant have applications for use:
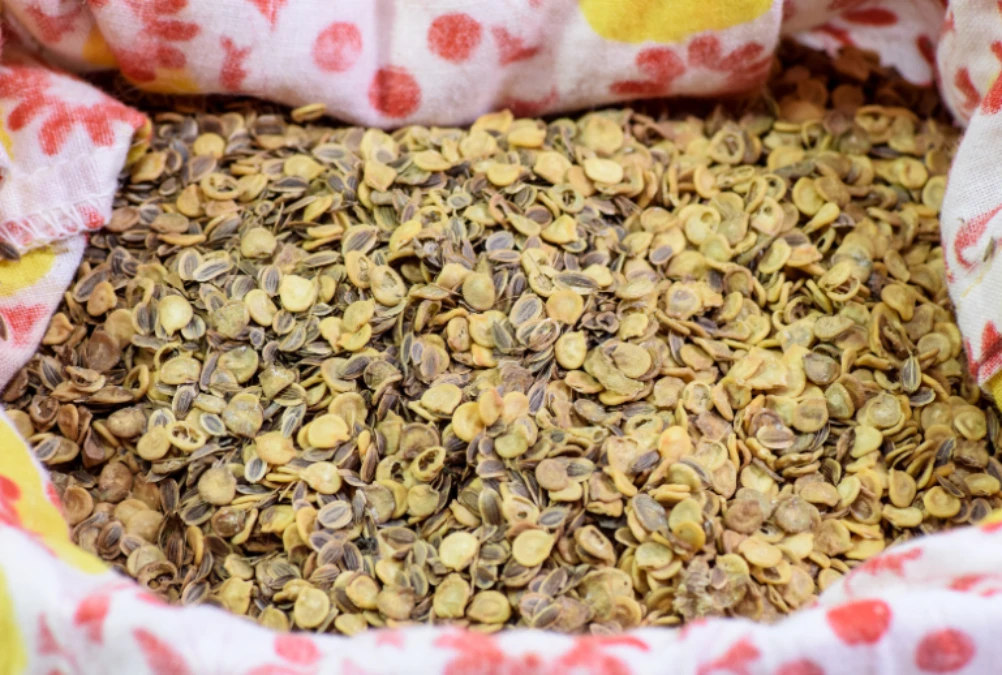
Seeds: Once seed heads turn brown, seeds are ready to harvest. Dry them further indoors before storage and use. Dill seeds add strong flavor to pickling recipes, dressings, meats, bread and more.
Flowers (Umbels): The delicate yellow flower umbels offer mild flavor. Snip off whole flower heads after blooming but before seeds develop. Popular for fresh eating, marinades, vinaigrettes and garnish.
Stems: Cut young, tender leaf stems anytime for a subtle flavor enhancement. Wrap fresh dill stems with fish for grilling or add to soups and stews.
Leaves: Choose feathery dill leaves for fresh eating on salads, sandwiches and more. The leaves lose flavor intensity when dried, so use fresh. Leaf tips can also be snipped as a garnish.
Roots: In some cuisines like Eastern European, dill roots are collected when thinning for their unique earthy flavor. More tedious to gather than other parts but useful for pickling.
As you can see, no part of the dill plant goes to waste! Everything offers slightly different flavors to explore.
How Often to Harvest Dill
For best production, harvest dill regularly before it goes to seed. Snipping greens here and there will promote more leaf growth. With consistent harvesting, a dill plant will continue generating leaves for months. Time your sowing so seeds ripen later when the foliage production declines. Allow your last sowing to set seed at season end to collect for next year’s planting.
Step-By-Step Guide to Harvesting Dill

Follow these simple steps for how to cut dill so your harvest lasts as long as possible:
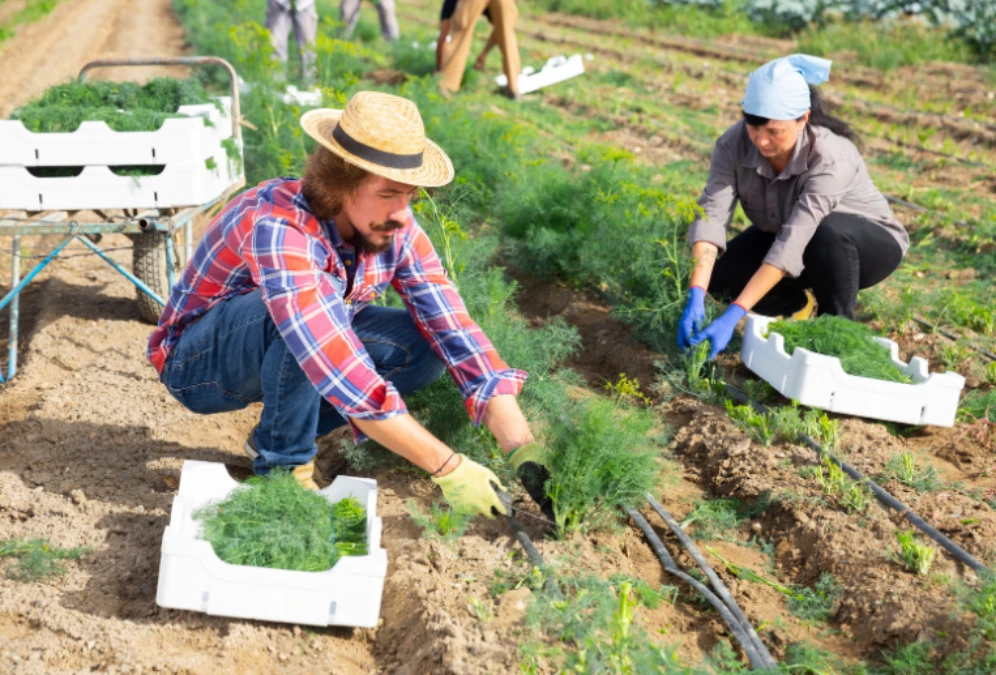
- Select Harvest Area: Assess the size and maturity of your dill. Cutting back weaker, slower-growing shoots allows robust stems to expand. Target harvesting to crowded areas first.
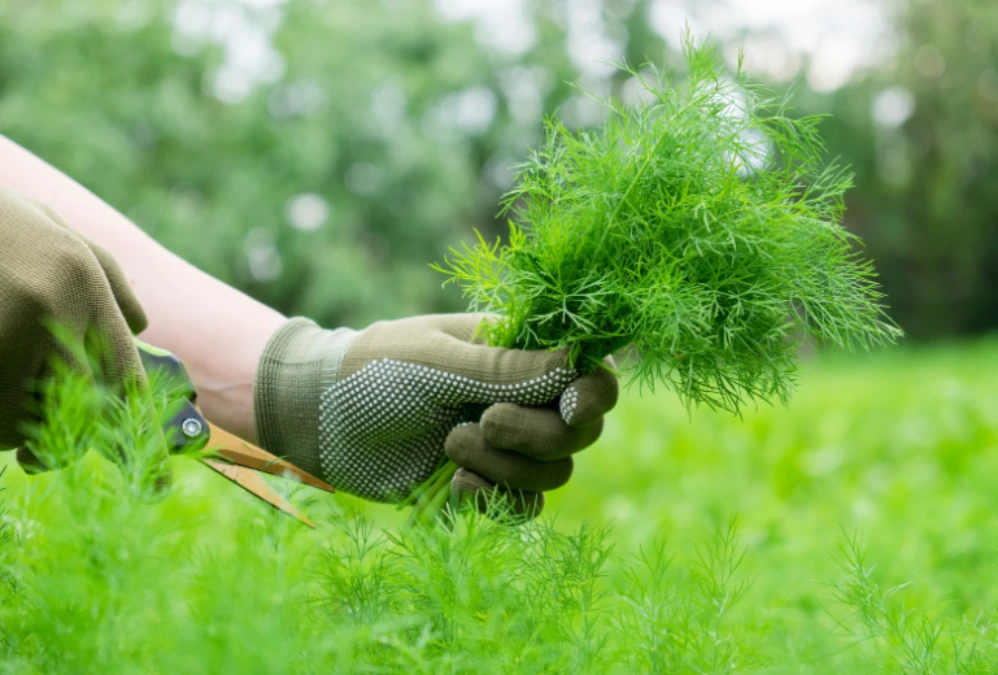
- Snip Off Stems: Use gardening shears or scissors for clean cuts. Cut each stem near the base of the plant or just above a set of leaves. Avoid tugging which could uproot the entire plant.
- Rinse Harvest: Give freshly harvested dill a quick cold water rinse to remove dirt or debris. Gently shake off excess moisture.
- Store Properly: For long-lasting fresh dill, stand up cut stems in a jar with an inch of water like a bouquet. Cover loosely with a plastic bag. Refrigerate for up to two weeks, changing the water every few days. Or put cleaned dill in resealable plastic bags for fridge or freezer storage.
- Preserve as Desired: To dry dill indoors, lay flat bunches on trays or hang bundled stems upside down in a warm, dry spot until crispy. Freeze chopped dill on trays before storing in airtight bags. Puree soft herbs like dill in olive oil and refrigerate or freeze in ice cube trays for flavoring later. Make dill vinegar by soaking leaves in warmed vinegar several weeks then straining.
- Allow Regrowth: Dill is a prolific self-seeding annual. By selectively harvesting you can stagger maturity and enjoy months of yield from each plant. New shoots will generate where you snip stems so you get continuous regrowth.
With this easy technique, a small plot of dill can supply your needs all season long!
Tips for Maximizing Your Dill Harvest
Follow these simple tips and tricks for an abundant dill crop:
| Don’t Overcrowd Dill | Good air circulation is crucial, so allow 6-10 inches between plants. Container dill also needs room to prevent mold and mildew. |
| Water Regularly | Consistent moisture produces the best growth and flavor. Dill’s long taproot draws water from deep so aim for weekly deep watering rather than frequent light sprinkles. |
| Stake Tall Varieties | Flopping or fallen plants can’t photosynthesize efficiently. Support vertical growth with tomato cages, trellises or poles. |
| Weed Diligently | Reduce competition by frequently clearing the area around dill of invasive grass and weeds. Apply thick mulch to also deter potential weeds. |
| Fertilize Sparingly | Too much nitrogen fertilizer creates excess foliage at the expense of seed and flower production. Go easy on high-nitrogen feeds and compost. |
| Know When to Quit | Even the most religious harvesting won’t prevent aging dill plants from eventually going to seed. At season end, allow some seed heads to dry fully to collect dill seeds for next year’s garden. |
Common Problems When Harvesting Dill
Even experienced gardeners encounter occasional issues with dill growth or harvesting. Some common problems and solutions:
Bolting
Hot weather prompts premature flowering leading to quick seeding and reduced foliage. Control bolting by planting in cooler fall weather, adding shade covers and providing consistent moisture. Harvest regularly before flowering.
Pests
Watch for common culprits like aphids, cabbage loopers and spider mites which can destroy dill crop quality and growth. Practice good garden sanitation and product application for infestations.
Moldy Foliage
Excess moisture and poor circulation cause rotten or moldy leaves inhumid climates. Space plants properly and water carefully at soil level to minimize moisture on foliage. Discard any molded harvest.
Weak Regrowth
Overharvesting the shoots before they establish will stunt further regrowth. Allow young shoots time to mature several leaves before cutting again. Fertilizing after harvesting helps energize plants too.
Pay attention to your crop’s growth habits, apply good horticultural practices and harvest foliage judiciously. Troubleshooting issues promptly means you can still enjoy a bountiful dill crop.
How to Use Your Freshly Harvested Dill
Beyond basic seasoning, dill offers many diverse uses. Here are some top ways to utilize your harvested herb:
- Mix into egg, potato or tuna salad recipes
- Add to homemade dressings and dipping sauces
- Grill with fish or chicken
- Bake into breads and scones
- Combine with cucumbers for quick refrigerator pickles
- Blend with Greek yogurt for a vegetable dip
- Sprinkle on deviled eggs
- Stuff under salmon skin before roasting
- Puree with lemon, garlic and oil as a marinade
- Simmer in soups, stews and grain dishes
- Steam with carrots, beets or green beans
The mild grassy flavor of dill brightens everything from appetizers to main courses to desserts. It also pairs perfectly with other summer flavors like lemon, onions and mustard. Now that you know how to successfully harvest dill, you can enjoy it’s versatility all season long!
Storing Your Dill Harvest
Proper post-harvest storage retains flavor and extends your usable yield. Here are suitable methods for different forms of dill:
Fresh
- Rinse off dirt then stand bundled stems upright in water-filled jars, as you would fresh flowers. Loosely tent plastic wrap over the top. Refrigerate jarred dill; change the water every 2-3 days. Lasts up to 2 weeks.
- Pack rinsed sprigs and leaves in resealable plastic food storage bags. Squeeze out air pockets before sealing tightly. Refrigerate in high humidity drawer up to 10 days.
Frozen
- Line baking sheets with clean parchment paper. Arrange cleaned, dry dill sprigs in a single layer without overlapping. Freeze solid overnight then transfer frozen dill to labeled freezer bags or containers. Frozen dill lasts up to one year.
Dried
- Gather 5-6 cut stems together with a rubber band just below the seed heads. Hang bundled dill upside down in a dry, shaded spot with good air circulation.Seeds and leaves will dry within 1-2 weeks.
- Alternatively, lay washed and dried sprigs in a single layer on dehydrator trays or baking sheets. Dehydrate at 95°F until crisp, about 1-4 hours. Check frequently to prevent scorching leaves.
- Store thoroughly dried dill leaves in airtight glass jars or tins for 3-6 months. Refrigerate dried seeds up to one year. Discard any dill showing signs of moisture or deterioration.
Follow these storage guidelines for peak quality retention of your dill harvest all year long! Adjust methods as needed for your unique climate conditions.
FAQs About Harvesting Dill
Removing flower umbels redirects the plant’s energy into more leaf and stem growth instead of seed production. So regular snipping can minimize self-seeding. But allow some seed heads to mature fully at season end to collect seeds for next year.
Harvest in early morning just after dew dries but before the sun gets hot. The plant contains the most essential oil flavors at this time. Avoid harvesting wet foliage which can encourage mold issues.
It’s best to begin harvesting dill greens before it blooms for premium flavor. But you can still selectively cut some leaves after flowering starts, taking care not to damage forming seed heads. Just know mature foliage will be less tender.
As a general rule, don’t remove more than one-third of total foliage at any one harvest session. Cutting back too severely stunts regrowth. Target the most developed stalks first and leave smaller ones to mature for later picking.
Inadequate spacing, water or nutrients can limit plant size and productivity. Hot summer weather also speeds up flowering and causes bitter or strong flavors. Maintain optimal growing conditions and harvest frequently to maximize yields over a longer window.
Enjoy an Abundant Dill Harvest
Adding fresh dill’s iconic flavor transforms to everyday recipes when you know how to harvest it properly. Follow this guide to identify maturity, select plant parts, troubleshoot issues, store correctly and utilize your yield.
A little attentive care means your dill keeps generating more greens through regular careful cuttings. Harvest and preserve dill using multiple methods to spice up meals all year long. The versatility of this aromatic herb makes all the harvesting effort truly rewarding for gardeners who love cooking with fresh flavors!

